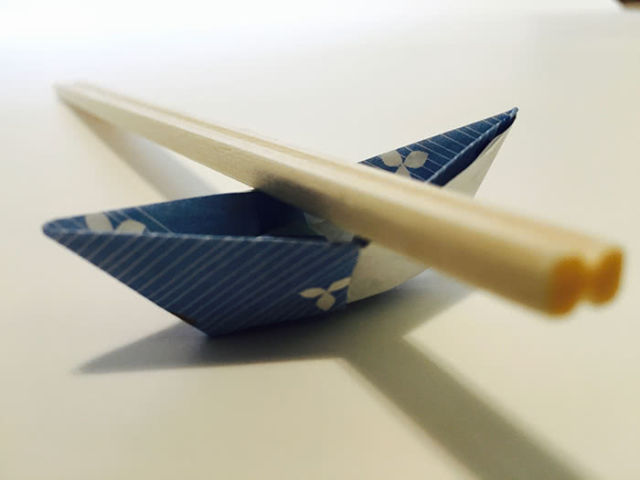
Origami Chopstick Holder: Boat Instructions in 13 Easy Steps
Update-Date: Jun 2, 2025
Author:
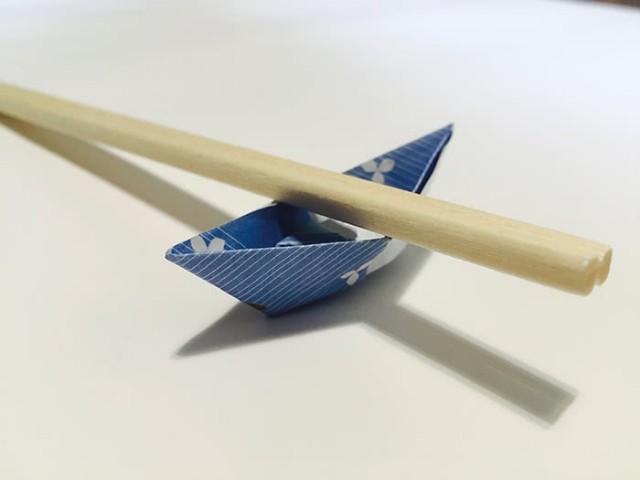
How to Make an Origami Chopstick Holder Boat
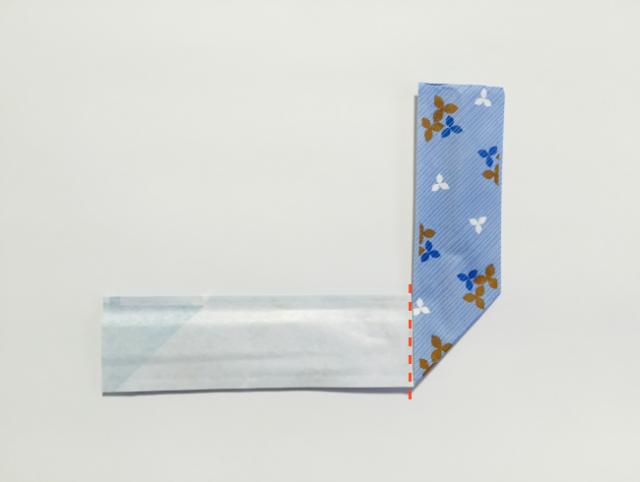
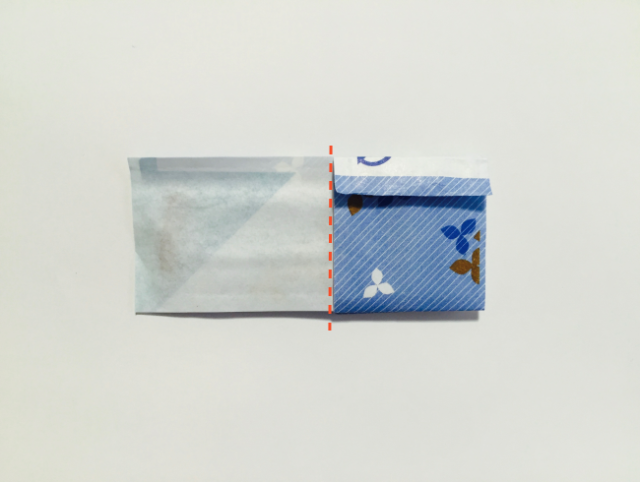
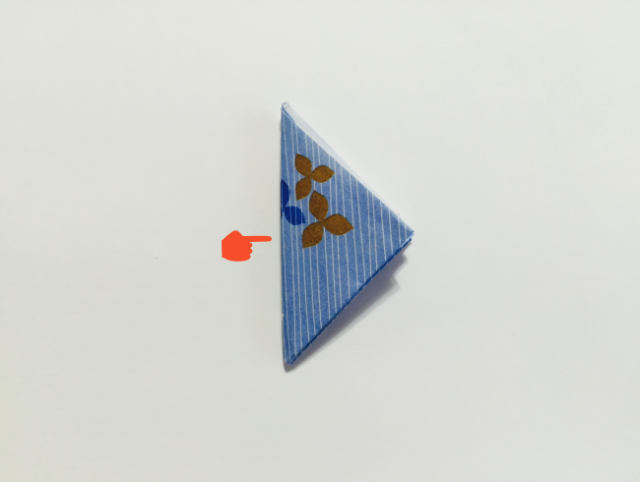
Step 1

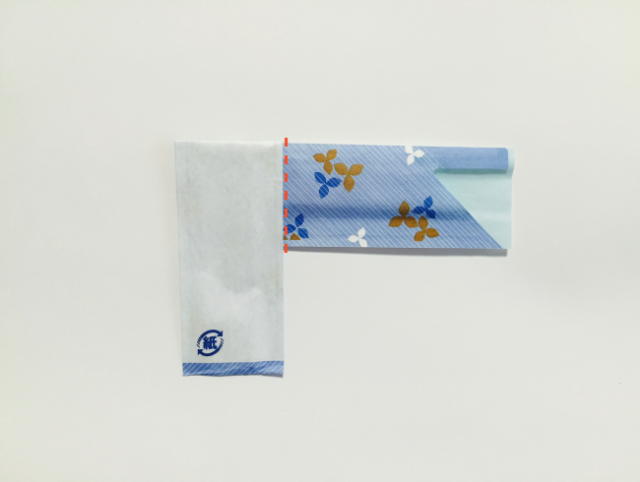
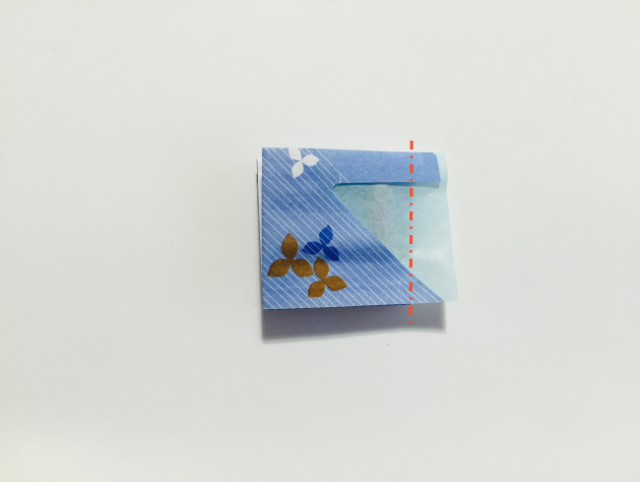
Step 2

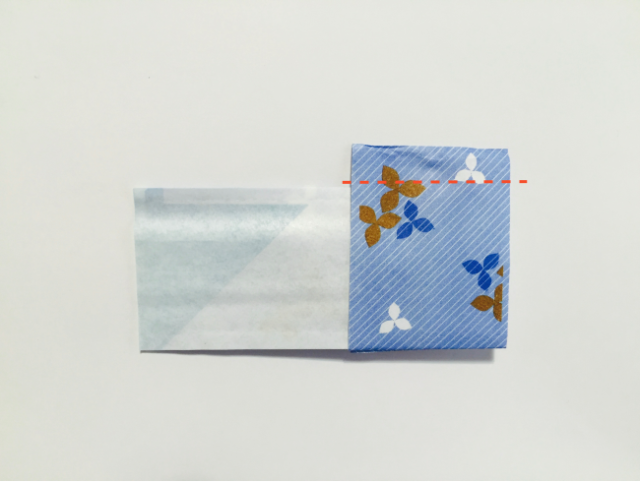
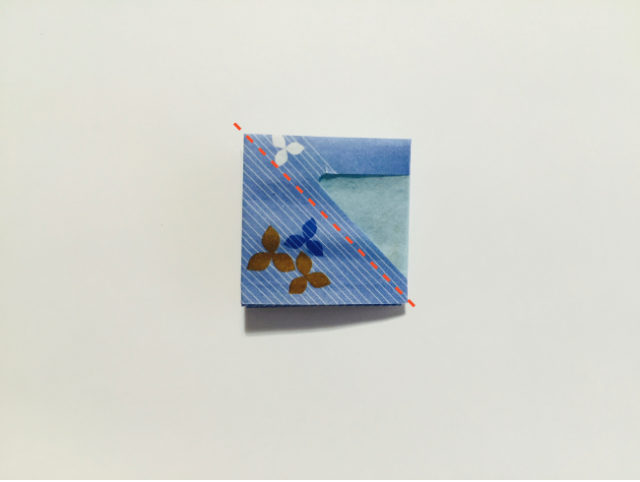
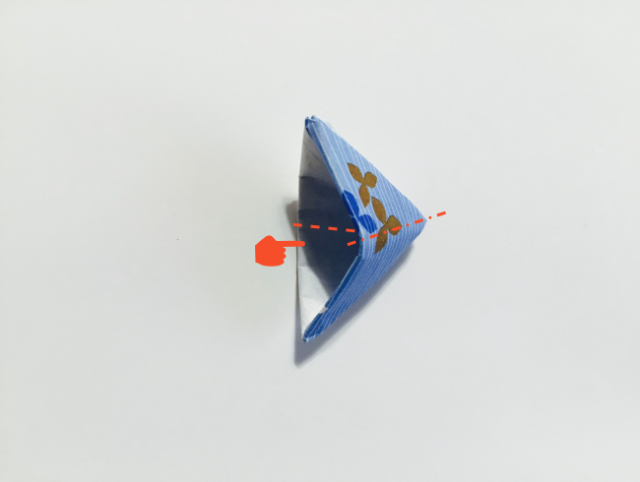
Step 3
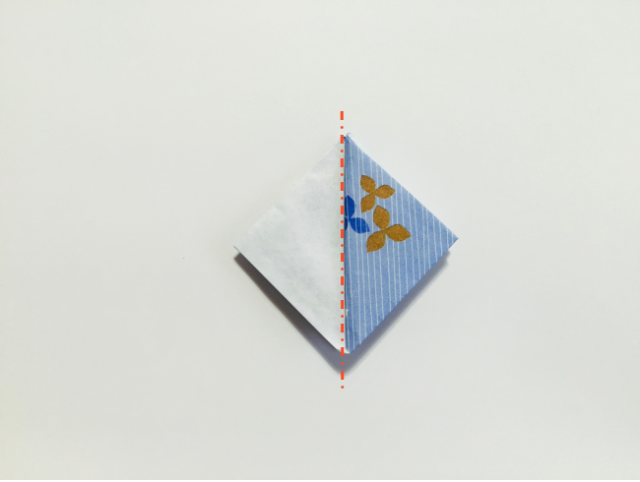
Step 4

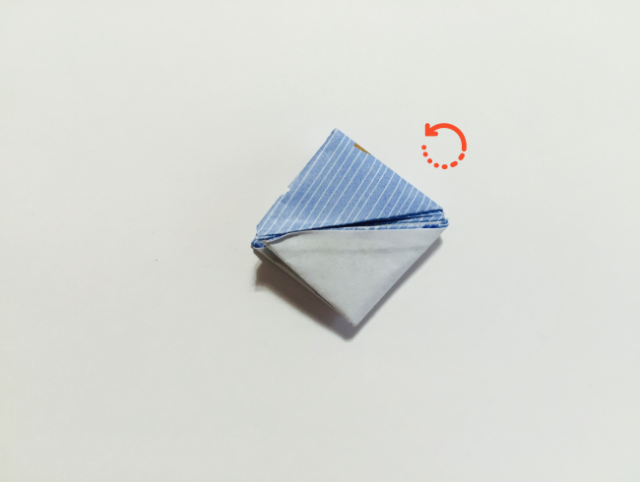
Step 5
Step 6

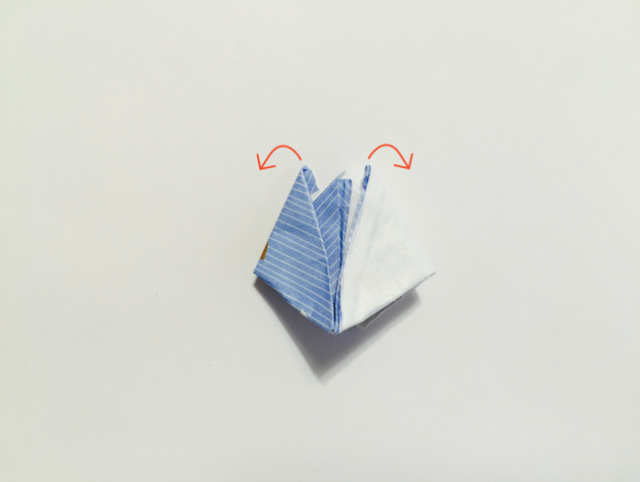
Step 7
Step 8
Step 9
Step 10
Step 11
Step 12
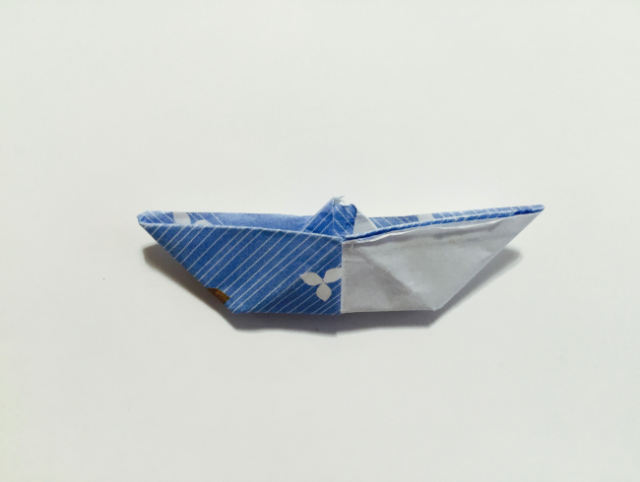
Step 13
Your Chopstick Holder Origami Boat is Complete

Disclaimer: All information is accurate at time of publication.
Discover more restaurants by area
Keywords
Update-Date: Jun 2, 2025
Author:
Related Articles
-
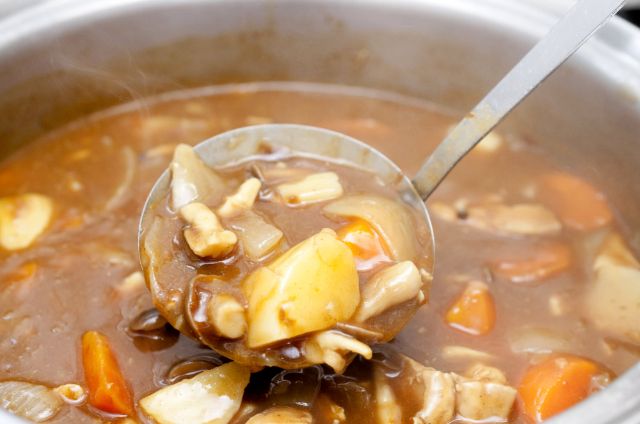
The Charm and History of Japanese Curry, One of their National Dishes
What kind of curry do you like? Is it the traditional one with a blend of various spices, or Thai curry with coconut milk? This article will introduce the Japanese type – mildly flavored chicken curry with potatoes and carrots. It is known as one of Japan’s national dishes together with ramen, and is so popular among the locals that some would claim to even drink the curry sauce on its own! So what are the characteristics of this favorite food of the Japanese? Let's take a look!
-
![Voyage for [Fukui Amaebi], the Future of Fishermen | Part 1](https://rimage.savorjapan.com/svj/image/discover_oishii_japan/1553/article_head.jpg?t=1649469383)
Voyage for [Fukui Amaebi], the Future of Fishermen | Part 1
When asked about the local specialty of Fukui Prefecture, what comes to your mind? Echizen crab, or the king of the winter, would be a classic choice. Records claim that the oldest snow crab fishing in Japan was in Fukui Prefecture. During the Edo period, Echizen crab was one of the designated offerings for the shogunate. However, the crab is not the only seafood that can be caught here. The offshore from Tango-hantō to Noto-hantō peninsula, which is a fishing ground for crabs, is also a well-known spot for the amaebi sweet shrimp. The brand “Fukui Amaebi” was established in 2021 with an aspiration to promote sophisticated jumbo amaebi as a local delicacy. To unearth the secrets to the sweet amaebi that melts in your mouth, we flew straight to Fukui.
-
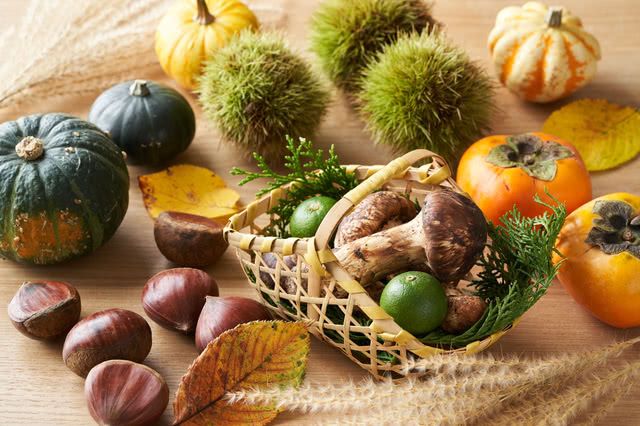
Savor the Flavors of Autumn in Japan! ‘Tis the Season for Eating!
Autumn is when many delicious ingredients come into season in Japan, so the locals consider it the most appetizing season of the year. This article features Japanese foods that you have to try and some restaurants where you can have them when you travel to Japan in autumn!
-
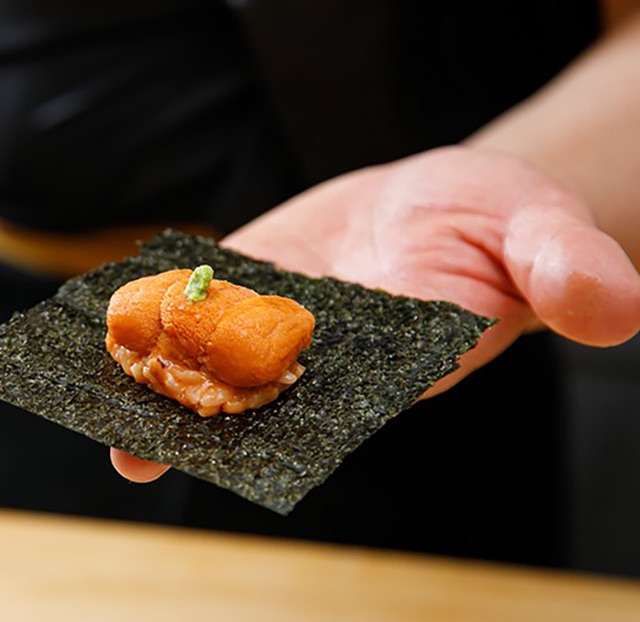
Experience Artisanal Mastery in Every Bite! 5 Nagoya Restaurants Where Guests Can Savor Exceptional Sushi at Counter Tables
For those who have not visited such restaurants, enjoying the Chef's Choice Courses at the counter of a high-class sushi restaurant is like a dream come true. Here are some high-class sushi restaurants that are perfect for many situations, including dates, dinner parties, entertaining, and treating oneself. The sushi artisans at these restaurants use their finely honed techniques to turn high-quality ingredients into excellent foods that will deeply move guests.
-
Apprentice for a day! Chopstick making with classical artisan tools in Tokyo
In an era where dwindling rural populations and new ways of working threaten Japan’s ancient crafts, Kakehashi challenges tradition to preserve it. At this urban workshop, master craftsmen gain a stage for their work and ordinary people can become deshi for a day, learning to craft chopsticks and lacquerware using an expert’s tools. Join us on this tour of Tokyo’s artisan crafts to discover ancient culture in a new way.
![Enjoy tea ceremony preparation, tea kaiseki, and Japanese concept cocktails at [Sokkon] in Omotesando, Tokyo](https://rimage.savorjapan.com/svj/image/discover_oishii_japan/6432/article_head.jpg?t=1748376602)
New Articles
![[Hokkaido] Top 5 Popular Restaurants & Editor’s Picks Around Sapporo](https://rimage.savorjapan.com/svj/image/discover_oishii_japan/6979/article_head_150x105z.jpg?t=1772017426)
![[Osaka] Top 11 Popular Restaurants & Editor’s Picks](https://rimage.savorjapan.com/svj/image/discover_oishii_japan/6978/article_head_150x105z.jpg?t=1772016962)

Categories
Cuisine
- Bars (24)
-
Japanese Cuisine (695)
- Kaiseki (48)
- Nabe (20)
- Okonomiyaki (26)
- Shabu Shabu (38)
- Soba (19)
- Sushi (143)
- Tempura (19)
- Teppanyaki (48)
- Shojin Ryori (4)
- Tonkatsu (15)
- Kushiyaki (10)
- Yakitori (44)
- Sukiyaki (36)
- Japanese Cuisine (347)
- Oyster (3)
- Sashimi/ Seafood (29)
- Unagi (eel) (39)
- Motsu Nabe (offal hotpot) (10)
- Mizutaki (chicken hot pot) (4)
- Oden (8)
- Kaisendon (seafood bowl) (12)
- Udon (3)
- Taverns(Izakaya) Cuisine (128)
- Western Cuisine (43)
- Italian/French Cuisine (98)
- Yakiniku/Steak (232)
- Chinese Cuisine (26)
- Ramen (Noodles) Cuisine (24)
- Cafe/Sweets (64)
- Other Asian Cuisine (5)
- Global/International Cuisine (7)
- Alcohol (50)
- Other (11)
Area
- Shikoku (10)
- Kyoto and Osaka (348)
-
Tokyo (471)
- Tokyo (294)
- Ginza (46)
- Roppongi (21)
- Shibuya (28)
- Shinjuku (47)
- Asakusa (21)
- Ebisu (12)
- Tsukiji (12)
- Tokyo Landmarks (4)
- Ueno (23)
- Akihabara (9)
- Ikebukuro (13)
- Jiyugaoka, Denenchofu, Nakameguro (9)
- Shimokitazawa (4)
- Kichijoji (3)
- Tachikawa (1)
- Omotesando, Harajuku, Aoyama (18)
- Akabane (1)
- Kagurazaka (4)
- Akasaka (11)
- Odaiba (2)
- Tsukishima, Harumi, Toyosu (3)
- Near Tokyo (101)
- Okinawa and Ryukyu Islands (59)
- Hokkaido (125)
- Northern Honshu (Tohoku) (31)
- Central Honshu (Chubu) (143)
- Western Honshu (Chugoku) (34)
- Kyushu (94)
Archives
- February 2026(12)
- January 2026(11)
- December 2025(9)
- November 2025(4)
- October 2025(3)
- September 2025(6)
- August 2025(11)
- July 2025(19)
- June 2025(18)
- May 2025(34)
- April 2025(43)
- March 2025(30)
- February 2025(36)
- January 2025(26)
- December 2024(69)
- November 2024(31)
- October 2024(15)
- September 2024(39)
- August 2024(65)
- July 2024(31)
- June 2024(54)
- May 2024(61)
- April 2024(28)
- March 2024(31)
- February 2024(42)
- January 2024(32)
- December 2023(20)
- November 2023(5)
- October 2023(11)
- September 2023(7)
- August 2023(18)
- July 2023(8)
- June 2023(8)
- May 2023(18)
- April 2023(15)
- March 2023(1)
- January 2023(1)
- April 2022(2)
- March 2022(2)
- February 2022(1)
- January 2022(1)
- July 2021(1)
- March 2021(1)
- February 2021(1)
- December 2020(1)
- October 2020(1)
- September 2020(2)
- August 2020(10)
- July 2020(6)
- June 2020(9)
- May 2020(11)
- April 2020(8)
- March 2020(8)
- February 2020(13)
- January 2020(9)
- December 2019(24)
- November 2019(8)
- August 2019(14)
- July 2019(15)
- June 2019(18)
- May 2019(17)
- April 2019(16)
- March 2019(22)
- February 2019(22)
- January 2019(26)
- December 2018(34)
- November 2018(40)
- October 2018(32)
- September 2018(11)
- August 2018(8)
- July 2018(6)
- June 2018(9)
- May 2018(10)
- April 2018(21)
- March 2018(74)
- February 2018(39)
- January 2018(26)
- December 2017(60)
Keywords
- Omakase
- Accessible
- Affordable
- All-You-Can-Eat
- Amazing Scenery
- anime
- Art
- Autumn
- Awards
- Beer Gardens
- Breakfast
- Chef Recommendations
- Cherry Blossoms
- Chinese
- Close To Station
- Condiments
- Counter
- Coupon
- Crab
- Culture
- Dassai
- Dates
- delivery
- Early Summer
- Editor's Recommendation
- English Available
- Event
- Expo
- Fall Leaves
- Family-Friendly
- Famous Restaurant
- Famous Tourist Spot
- Fast Food
- festival
- fireworks
- Flower Farm
- Free Wi-Fi
- French
- Great Location
- Guide
- Hibachi
- hotpot
- How To
- hydrangea
- Hygiene
- Illumination
- Italian
- Izakaya
- Japanese
- Japanese alcohol
- jingisukan
- Kaiseki
- Kappo
- Kushiage
- Kushikatsu
- Kyoto
- Late-Night
- Lunch
- Manners
- matsusakagyu
- Michelin
- mizutaki
- Model Course
- monjayaki
- motsunabe
- Mt.Fuji
- Multilingual Menus
- Nabe
- Narita Airport
- New Year
- Ninja
- Noodle
- Oden
- Okonomiyaki
- omotenashi
- Onsen
- Osaka
- Osaka Station
- Photogenic Site
- pizza
- PR
- Private Room
- Ramen
- ranking
- Recipe
- Regional Cuisine
- Resort
- Rice Bowl Dish (Donburi)
- sacred places
- Sake
- Sakura
- Sashimi
- sea urchin
- Setouchi Area
- Shabu Shabu
- sightseeing
- Signature Dish
- Soba
- Solo Diners Welcomed
- Spicy Food
- Spring
- Steak
- Summer
- Sunflower
- Sushi
- takeout
- Teppanyaki
- Terrace Seating
- Tokyo
- Tokyo Experiences
- Tokyo Skytree
- Tokyo Tower
- unagi
- UNESCO
- Vegan
- Vegetarian
- Wagyu
- What Popular Gourmet Sites Recommend
- Whisky
- Wine Bar
- Winter
- Wisteria
- Workshop
- World Heritage Site
- World Writers
- Yakiniku
- Yoshoku
- Yuba
- Zen
Discover Restaurants By Area
-

Tokyo Area
Japan's largest city, Tokyo, is the center of culinary culture in Japan. Countless Tokyo restaurants serve every kind of food imaginable and the Toyosu fish market keeps restaurants stocked with the nation's finest fish.
-

Near Tokyo
Coastal areas, mountains and valleys surrounding Tokyo are bursting with tourist destinations, such as hot springs and ski slopes, where many unique foods are only available locally.
-

Kyoto and Osaka Area
The cities of Kyoto and Osaka, together with their surrounding areas, have greatly influenced Japan's culinary culture since the 7th Century. The region is renowned for its entertainment, Kobe beef, and wide-ranging traditional dishes.
-

Hokkaido Area
The island of Hokkaido is home to wide-ranging produce of the finest quality, such as rice, meat, vegetables, fish and fruit. Popular dishes from Hokkaido include robatayaki (food slowly roasted on skewers) and Sapporo miso ramen.
-

Northern Honshu (Tohoku)
The northern end of Japan's main island, Honshu, is renowned for its seasonal fruit and vegetables, nation-leading harvest of fish (especially tuna from Ohma), and delicious beef from Yonezawa, Sendai and Yamagata.
-

Central Honshu (Chubu)
Chubu is in the center of Japan's main island, Honshu, and its culinary culture reflects its position between Japan's western and eastern halves. Delicious Hida beef, world-famous Mount Fuji and many acclaimed sake breweries are in Chubu.
-

Western Honshu (Chugoku)
Chugoku, on the southwest of Japan's main island, is rich with diverse produce. Many of its products are praised as Japan's best, including Matsuba crabs from Tottori and oysters from Hiroshima. Its pears and muscats are also top grade.
-

Shikoku
The mild climate of Shikoku is ideal for growing citrus fruit such as sudachi. Shikoku is also famous for Sanuki udon noodles, huge yields of tiger prawn from Ehime Prefecture and the best torafugu (tiger globefish) in the country.
-

Kyushu
Western culture was first introduced to Japan through Kyushu, Japan's third largest island, where the influence of Portuguese and other western cuisine influenced the creation of a colorful culinary tradition.
-

Okinawa and Ryukyu Islands
Okinawa, Japan’s southernmost prefecture, is a treasure trove of distinctive dishes and drinks that have become popular throughout Japan, including Okinawa soba, unique sushi toppings and Awamori distilled liquor.